Difference between revisions of "Picture and element positioning"
Jump to navigation
Jump to search
old>Admin |
old>Admin |
||
| Line 3: | Line 3: | ||
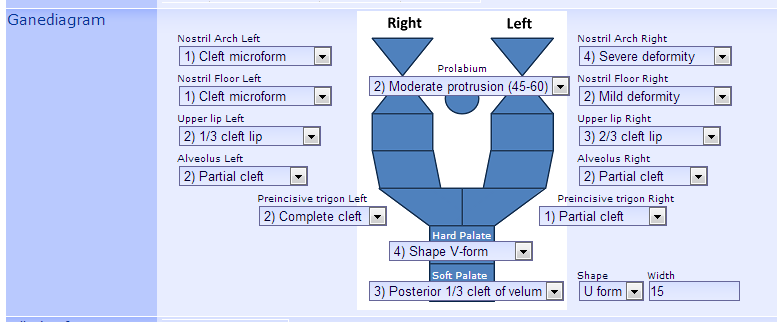
[[File:GaneDiagram.PNG]] | [[File:GaneDiagram.PNG]] | ||
== How to do it == | |||
# Upload a picture to Media files and copy the URL | # Upload a picture to Media files and copy the URL | ||
# Add a Static content element and insert picture reference | # Add a Static content element and insert picture reference | ||
| Line 15: | Line 15: | ||
#: '''top: '''[OFFSET]'''px;''' | #: '''top: '''[OFFSET]'''px;''' | ||
#: '''left: '''[OFFSET]'''px;''' | #: '''left: '''[OFFSET]'''px;''' | ||
== Sample CSS == | == Sample CSS == | ||
Revision as of 12:18, 25 September 2013
Sometimes you will want to merge form elements with an illustration:
How to do it
- Upload a picture to Media files and copy the URL
- Add a Static content element and insert picture reference
- <img src=COPIED_URL>
- Add other fields and merge the with the picture field (above)
- Create a stylesheet extension and link to the solution
- The outer element of the picture should have the following CSS element
- position: relative;
- The picture and fields inside should have the following CSS elements
- position: absolute;
- top: [OFFSET]px;
- left: [OFFSET]px;
Sample CSS
 .PAGE_28013 td {
   position: relative;
 }
 #VB_PICTURE {
   position: absolute; //relative to outer element
   left: 0px; //Upper left corner
   top: 0px;
 }
 #NB_INPUTBOX1 { //Label
   position: absolute; //relative to outer element
   left: 10px;
   top: 10px; //Above input box
 }
 #VB_INPUTBOX1 { //Input
   position: absolute; //relative to outer element
   left: 10px;
   top: 10px;  //Below descriptive label
 }
